blog · git · desktop · images · contact
2008-06-02
Quite a long time ago, I wrote an "article" (german) about delt0r's fluid simulation: It's a plugin for Art of Illusion that allows you to simulate fluids. Unfortunately, it was written in german, so for most people it was worthless. Still, there's no direct translation yet - the article is rather longish and my time is limited. :( So, here's a shortened version, some kind of "quick start guide"...
Please note that I've written this article from scratch, so some screenshots will show a "PolyMesh" where I'm talking about a "SplineMesh". I hope you don't get confused by that ... ;)
First of all: Where to get it? It's a bit hidden now and I don't know how long delt0r's link will remain available - so I mirrored it:
Just copy this file to your "Plugins" folder in your Art of Illusion directory.
Secondly, I suggest using an older version of AoI: Art of Illlusion 2.5.1
Parts of the animation code was changed in 2.6, so animating fluids is kind of broken with this version - but everything's fine with 2.5.1. :)
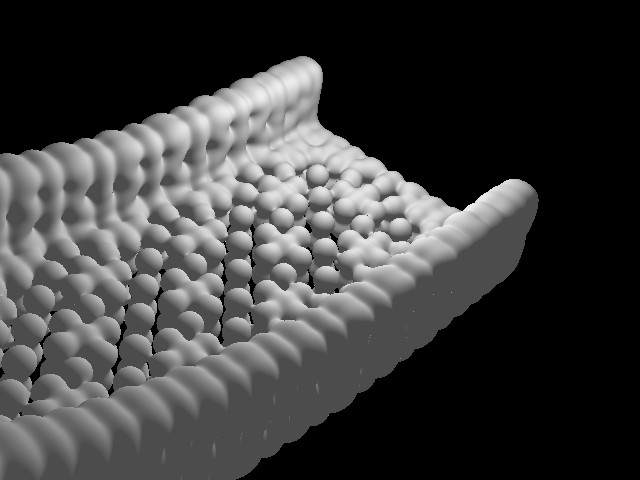
Internally, the world of fluids is reduced to "particles". This also means, that there are no "surfaces" any more - everything will consist out of particles, even your obstruction objects!
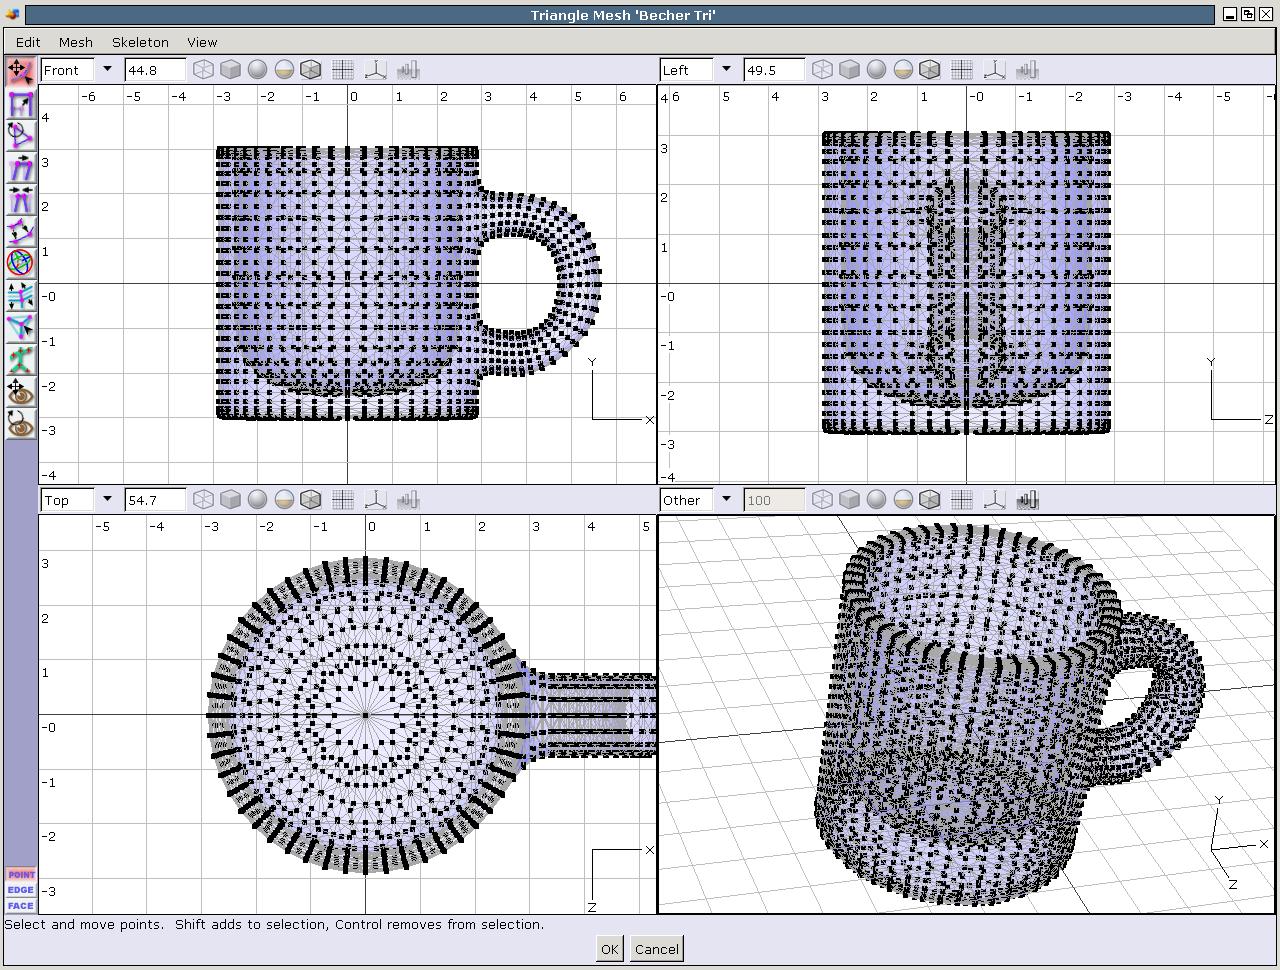
Just consider a ramp, a simple Triangle Mesh. To the plugin, the ramp would look like this:
The ramp's internal representation
Of course, we're not going to render all objects as particles now. It's just the model behind it - all non-fluid objects will be rendered as usual. But you should know about this fact and keep it in mind all the time.
If you want to pour some water down that ramp, all those "particles" on the ramp you can see in the image above will remain fixed, whereas the water-particles will be moving.
As you can imagine, the more particles you have, the more accurate your simulation will be. Of course, more particles usually means "smaller particle size".
An important thing: Every vertex of an object will become a particle!
First, we need some object that generates water. In theory, every object could be a so called "emitter", but you should keep it simple, so we'll be using a flat Spline Mesh here. We will be drawing it in front view (this is important for its orientation - I'll explain it in a few seconds, so please don't start creating it right now).
As mentioned above, every object's vertex will become a particle - so our emitter has to be subdivided fine enough to get a nice "stream". This image will make dimensions a bit more clear:
Another important thing for emitters: "Up" and "down". Every face of a mesh is oriented, so the common renderer knows what's "out" and "in" (remember texture mapping settings: "Front and back faces"?). For fluid simulation, this turns into something like "up" and "down". Newly generated fluid particles will have an initial speed and if you get this direction wrong, you won't get a nice "stream":
The very left emitter is oriented properly: A stream of fluids as you would expect it. The emitter on the right is oriented the wrong way, whereas the emitter in the center hasn't been altered at all.
Right, we want to produce that thing on the left. :)
Ok, now we know the backgrounds, so we can actually create an emitter. Just select the "Create Spline Mesh Tool" and keep its default options. Draw a spline mesh in front view, about 2x2 units large.
Now edit this object. Select all of its vertices and choose "Mesh" -> "Transform Points": Rotate all of them by -90 degree on the X-axis. This will result in the proper orientation.
You should end up with a scene similar to this:
To make it a bit more interesting, you could move the emitter right over the cups upper edge.
That's it - the emitter is done.
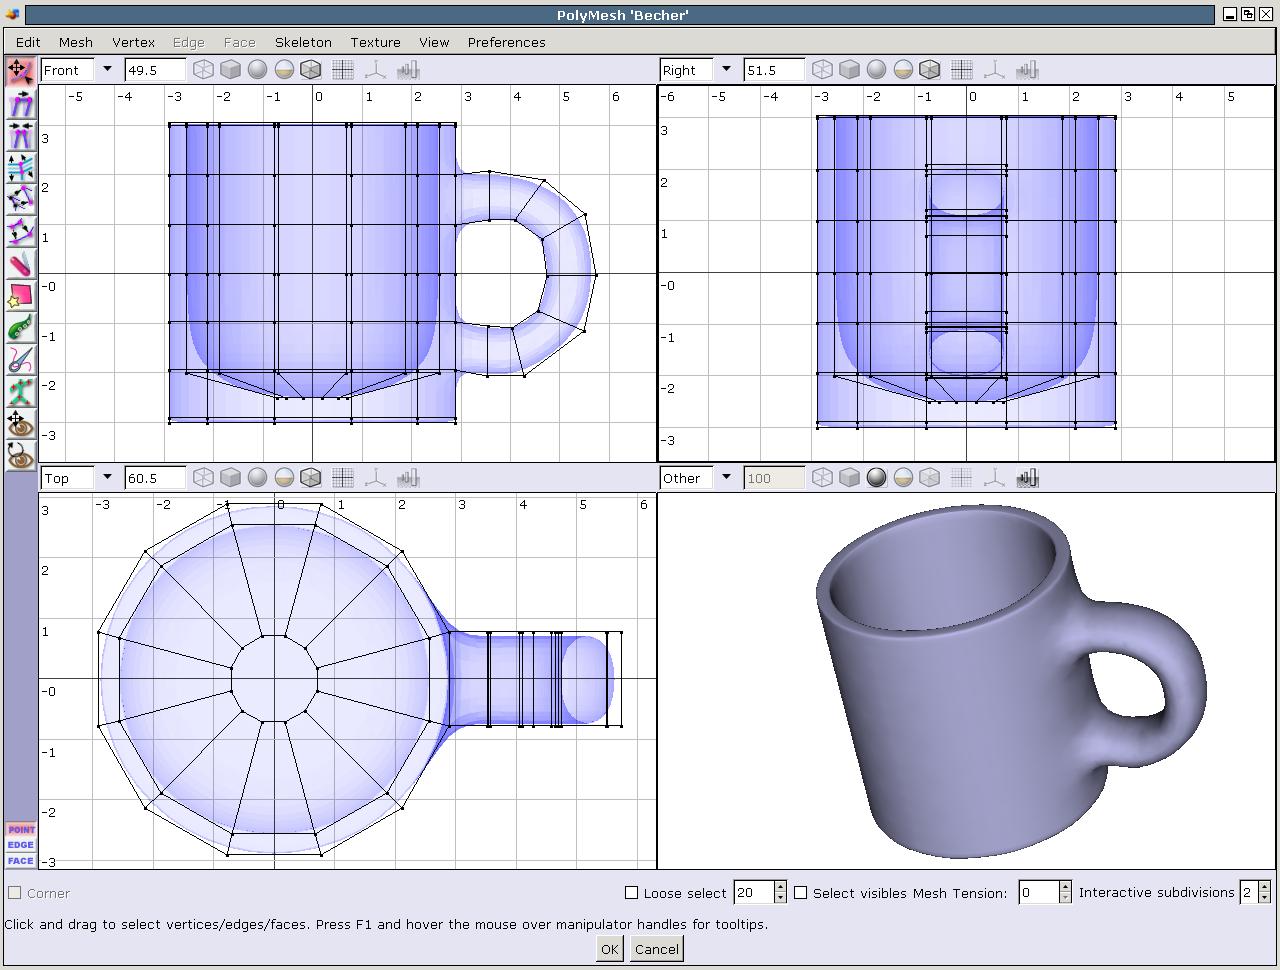
As you've just seen, we will be using a cup as obstruction. So, let's quickly model one of these (see Vidiot's Tutorial for details):
Keep an eye on its size - don't make it smaller!
If you have a look at the cup's image, you'll see that it has very few vertices. Remember: Every vertex will become a particle. This means, that we have to subdivide our cup.
We won't be editing the original cup but a copy of it, so duplicate the cup. Careful: Every object in the scene must have a different name!
Now, select the duplicated cup and convert it into a Triangle Mesh (assuming that you've initially created the cup as a Poly Mesh as shown in Vidiots Tutorial): "Object" -> "Convert to Triangle Mesh".
Edit the Tri-Cup and make sure it has enough vertices:
If you have too few vertices, switch to "Edge" mode and select all edges. Then choose "Mesh" -> "Subdivide Selected Edges".
After you've done that, make sure that "Mesh" -> "Smoothing Method" is set to "Approximating". This is kind of necessary.
Hint: For simple objects like boxes, it's useful to have smoothing completely disabled until you're done with subdividing. This prevents you from getting superfluous vertices.
Alright, we don't need to see this subdivided cup any longer. Hide it. :) It won't be rendered, it's only used as the obstruction in the simulation.
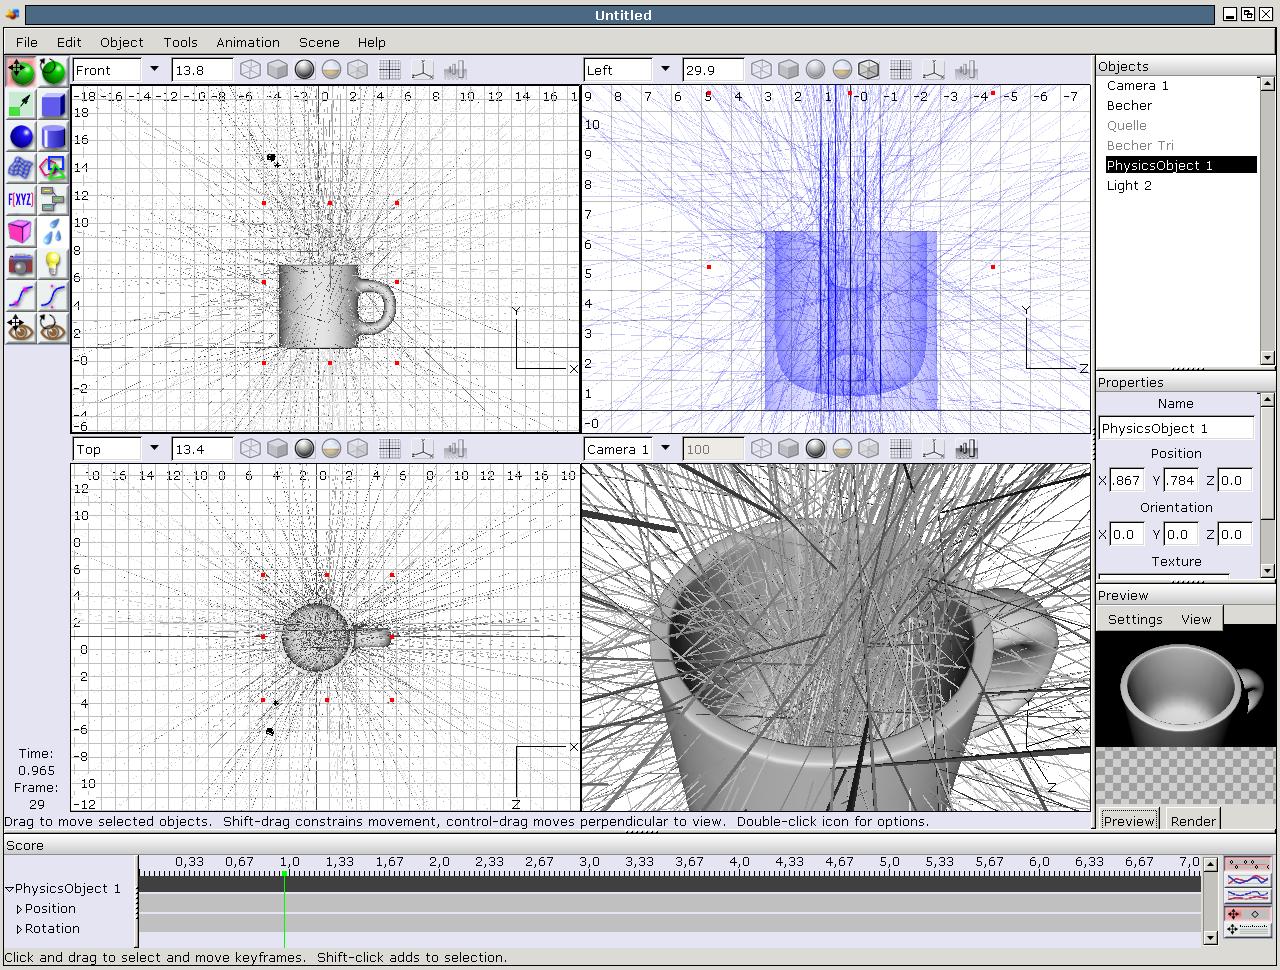
Our scene is now ready to get simulated, but we need another object: The physics "domain" (as it is called in Blender). In AoI's main window, choose the white icon with the drops of water on it. Now create a new object of this type around our scene:
Again, do it in the front view to get its orientation right. Also, keep some "margin" to the objects in the domain.
This is where the fun starts. Double click on this new object in the objects list to bring up its properties. We have to set a few things there:
Object Management:
Select your subdivided Tri-Cup and set its type to "BOUNDRY". Again, this object remains static.
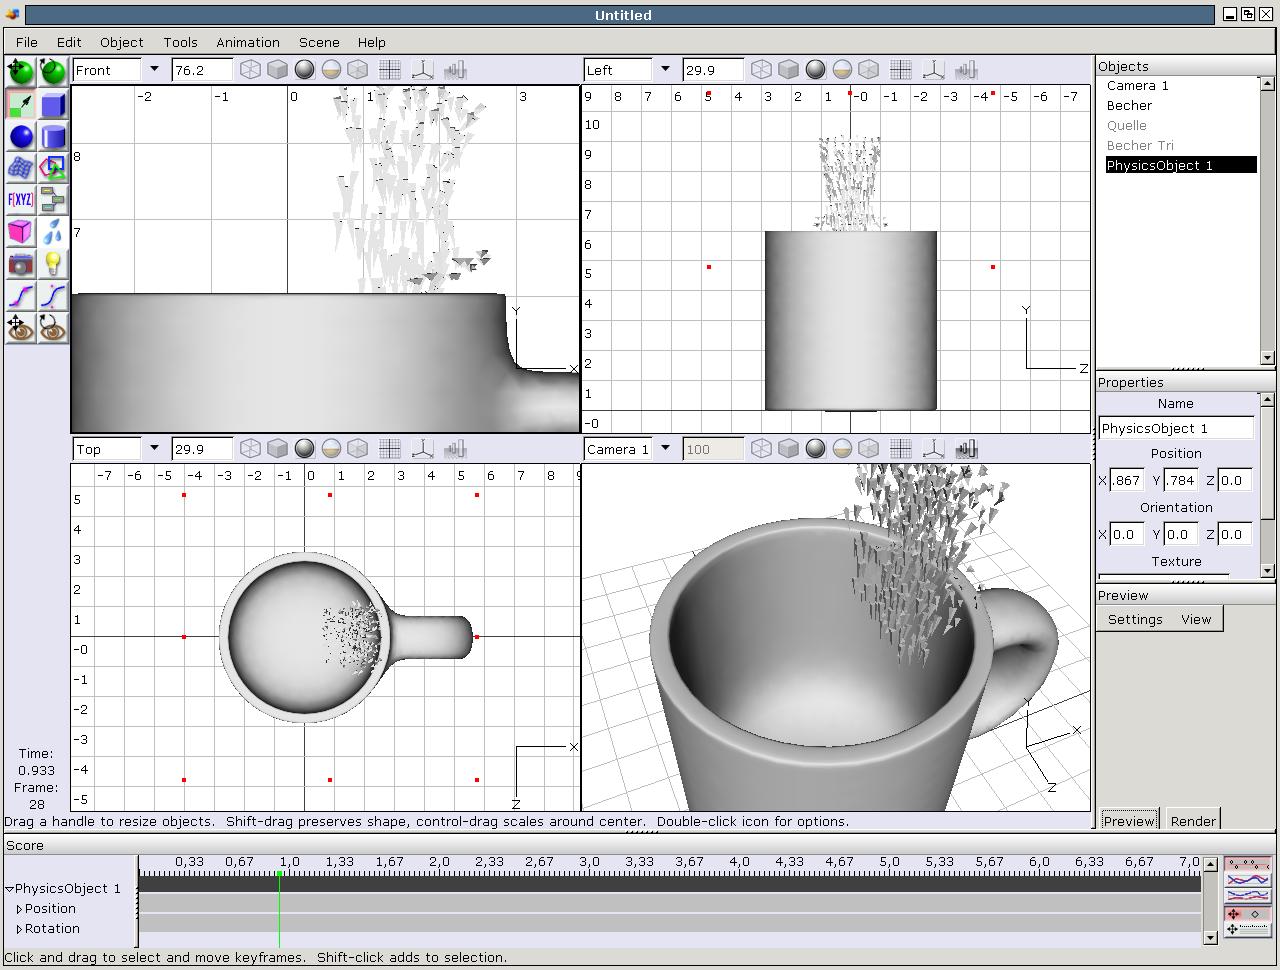
Switch to the "Fluid params" tab. Here you can set important parameters: Step size (resolution of time - a smaller value allows more frames per second), particle size and gravity ("body acceleration"). All these values are fine for now.
Important: When altering particle size, you should alter the step size in the same way! For example, reducing particle size by two should be followed by reducing step size by two. Otherwise you could get something like this:
Your fluids won't be there "at once". It's just like in real life, water flows. In our simulation, particles will be created out of the emitter and then they "flow their way". When they hit an obstruction object, they're deflected.
This simulation process is called "baking". It will create an animation, which means that you navigate through time like in any other animation. Of course, it doesn't matter whether you're actually rendering a series of images as an animation or just one single frame.
Ok, switch to the "Baking" tab and choose a target file (this is where the simulated data will be stored). Be aware that this file can grow to about 100MB! Set "Bake end time" to "5.0" - note that this is an absolute value, so it's not "bake for 5 seconds" but "bake until second number 5". Now hit "Bake".
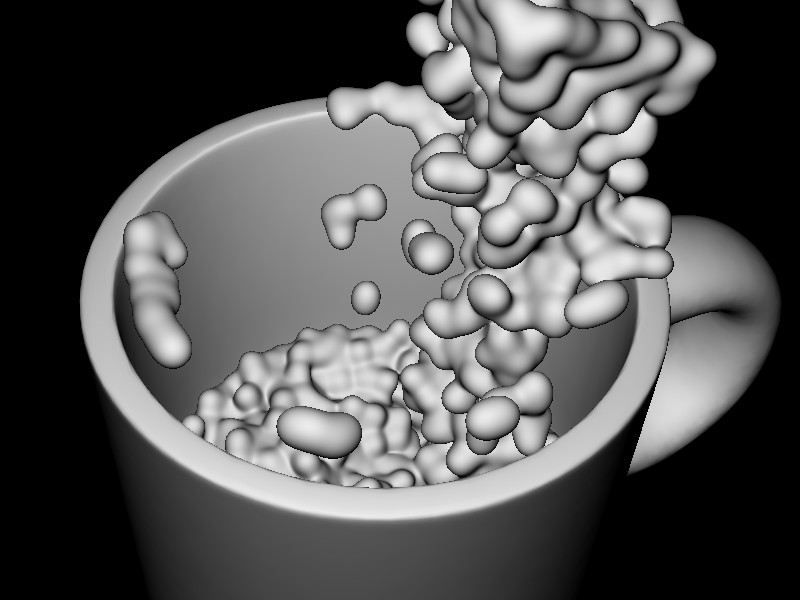
This can take some time. A possible result:
As you move the slider on the time scale, you will see how your fluids evolve!
Textures and materials are not a big deal: You can apply them to the physics object as usual.
Rendering, well, is actually not a big deal either. :) Anyhow, you should activate "Previews & views" -> "Use sample grid for raytracing" in the physics objects properties. This will speed up things a lot.
Note that only the Raytracer Rendering Engine will turn your "blocky fluids" into "real fluids". This means that you can use the Raster Rendering Engine to get a quick but dirty preview of your scene.
A raytrace could look like this:
Alright, that's it. :)
If you're trying to follow this guide, please keep in mind that the fluid simulation is in an early state of development. It is still beta!
Also, it requires a lot of time - you need to experiment with it and gain your own experience. This guide is rather short and I've left out many background information, but it should give you a rough idea. On the other hand, the rendering process still needs some optimization. Rendering a 1280x1024 image with transparent fluids and high quality anti aliasing can take up to 1 or 2 days depending on your machine. ;)
Please let me know whether this guide was useful or not and what I could try to explain again in more detail ... and please excuse may probably bad english. ;)
Feedback would best fit over there: http://friendlyskies.net/aoiforum/viewtopic.php?pid=12966
Ok, hf. :D